|
What is a rain garden?
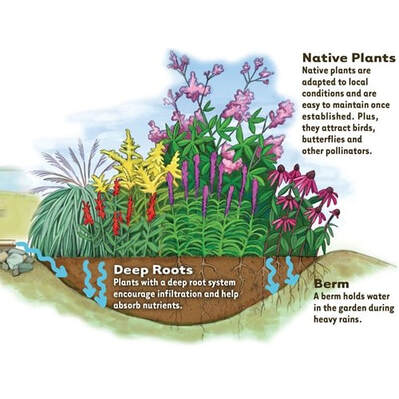
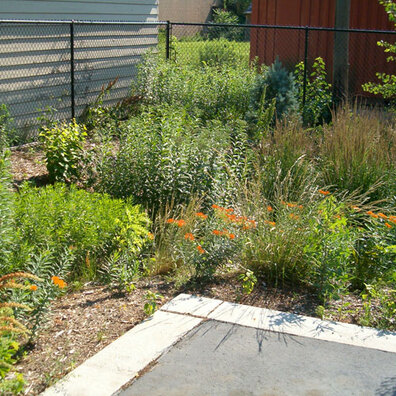
A rain garden is a stormwater feature, usually a shallow depression with plants, that captures stormwater and infiltrates it into the ground. It's Creek Smart® and an attractive feature of any property! |
|
There are three basic steps in constructing a rain garden:
Step 1: Find a site for your garden Step 2: Design your garden Step 3: Properly install your garden Let's begin with Step 1. |
|
|
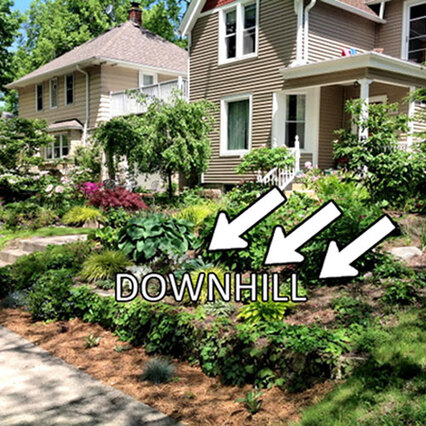
Because a rain garden will be designed to overflow in the event of extreme rainfall, it should always be placed downhill of any existing structures on your property.
There are several additional constraints on where a rain garden should go. |
|
Rain Garden Constraints:
1. Must be at least 10 ft downhill from any crawl spaces or basements 2. Must be at least 10 ft downhill from any existing wellheads 3. Must be 25 ft downhill from any existing septic systems |
|
|
And, as with any garden, it should be located in full or partial sun for happy and healthy plants!
|
|
Now that we've got the constraints out of the way, we need to find the 'pinch point' - that is, the place on your property where your water naturally flows. To capture as much water as possible, it's best to place the rain garden at a 'pinch point'.
To find your 'pinch point', simply watch your property during the next storm and watch where the water flows. This will give you a good idea of where your rain garden should go! |

|
|
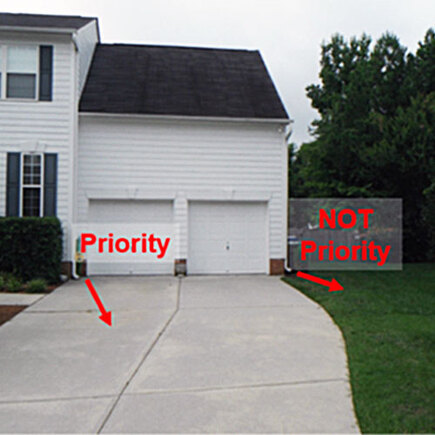
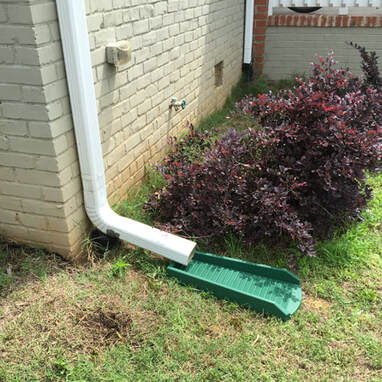
In a storm, the majority of runoff comes from impervious surfaces – such as your driveway, or the road. Any downspouts that deliver water directly to one of these surfaces are considered ‘priority downspouts’, and should be re-routed into your rain garden if possible.
|
|
Other downspouts can be used as well, but a downspout that already discharges onto a lawn is considered a Disconnected Downspout, and is already a Creek Smart® feature!
|
|
|
Now that you’ve identified a pinch point and your priority downspouts, you may have several spots where a rain garden can go.
To choose the best location, we need to do a infiltration test by digging a ‘test hole’. |
|
Before you dig the test hole, or perform any rain garden excavation on your property, please call NC 811 – it’s a free service that will mark utilities on your property!
Any spot where gas or electric utilities cross your property is unsuitable for a rain garden. |

|

|
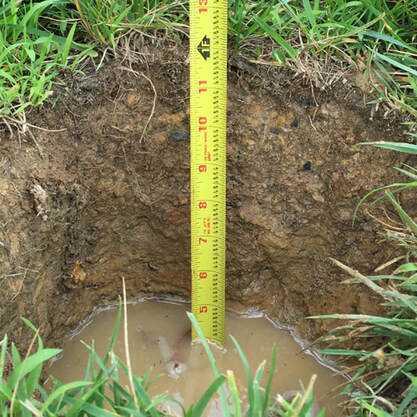
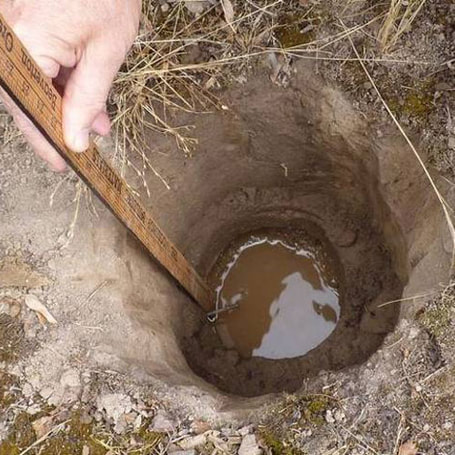
Perform an infiltration test by digging a test hole at least 12 inches deep. Fill it with water, and mark how long the hole takes to fully drain.
It’s best to dig 2-3 test holes near your potential rain garden sites. |
|
Perform an infiltration test by digging a test hole at least 12 inches deep. Fill it with water, and mark how long the hole takes to fully drain.
It’s best to dig 2-3 test holes near your potential rain garden sites. |
|
|
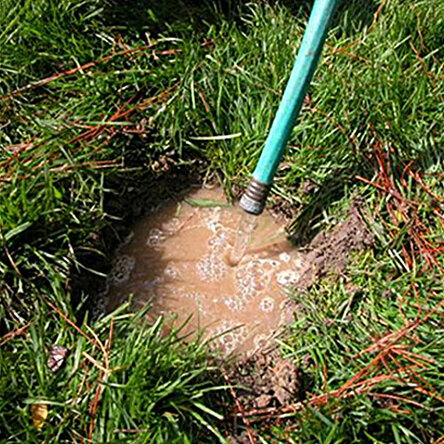
After your test hole has fully drained, fill it with water 2-3 additional times, and again mark how long each test hole takes to drain.
This will simulate saturated soil, and let you know how long your rain garden will take to drain in a worst case scenario. |
|
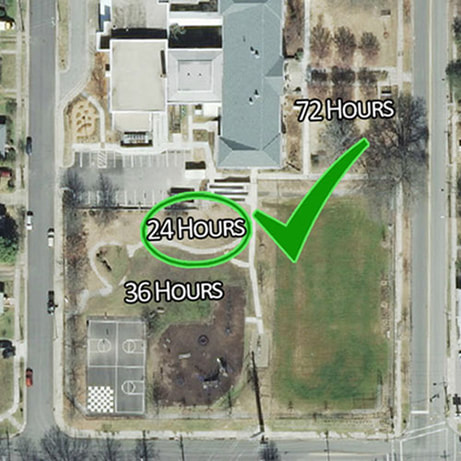
Once all the test holes are completed, choose the one that infiltrates best. This should be the best spot to put your rain garden.
Note the longest amount of time it took the test hole to drain at that spot. |

|
|
If your test hole drained within 12 hours, you should design a ‘Quick-draining Rain Garden’.
If it takes between 12-72 hours, you should design a ‘Standard Rain Garden’ . And if it takes longer than 72 hours, consider a ‘Wetland Garden’. |
|
Now that we have a site for your garden, and we know how long it takes to drain, we can move on to Step 2: Designing your Garden!
|
|